How to Create Notes

Use the Note tool to add comments or questions to a specific section of a digital title. You can also add a tag to a Note, a time-saving feature when searching a digital code title for a specific comment.

Notes are only visible to you and users with Concurrent access to the library or title.

Creating a Note

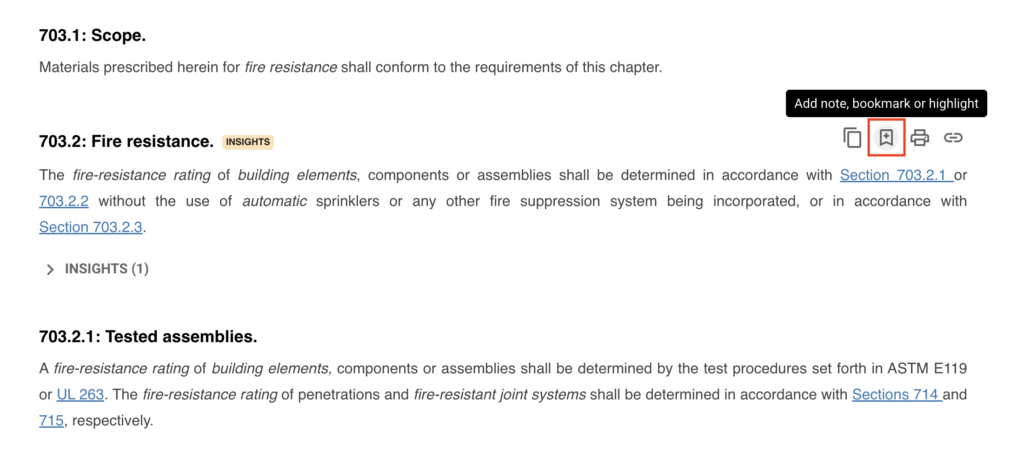
The first step is to hover your mouse over the right corner of any code section.

  1. You will then see the Section Action Toolbar appear.

  1. Click the Add Note, Bookmark, or Highlight icon to open the Note Panel.

    • A Note can be one of two things: an annotation (applies a highlight, highlight any text in the section to create an annotation or a bookmark which are both accessed from the icon (second icon in Toolbar).
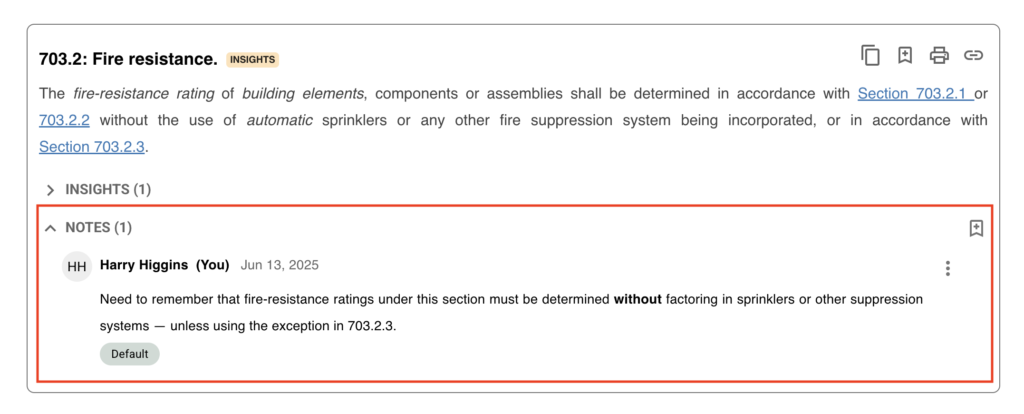
    • An annotation applies to a subset of the section text (which the highlight identifies). A bookmark applies to an entire section. Both appear inline beneath the section under the My notes heading once applied
  1. Highlight Note vs Bookmark Note

    • A Note can be one of two things: an annotation (applies a highlight) or a bookmark which is accessed from the same icon (second icon in Toolbar).
    • An annotation applies to a subset of the section text (which the highlight identifies). A bookmark applies to an entire section. Both appear inline beneath the section under the My notes heading once applied
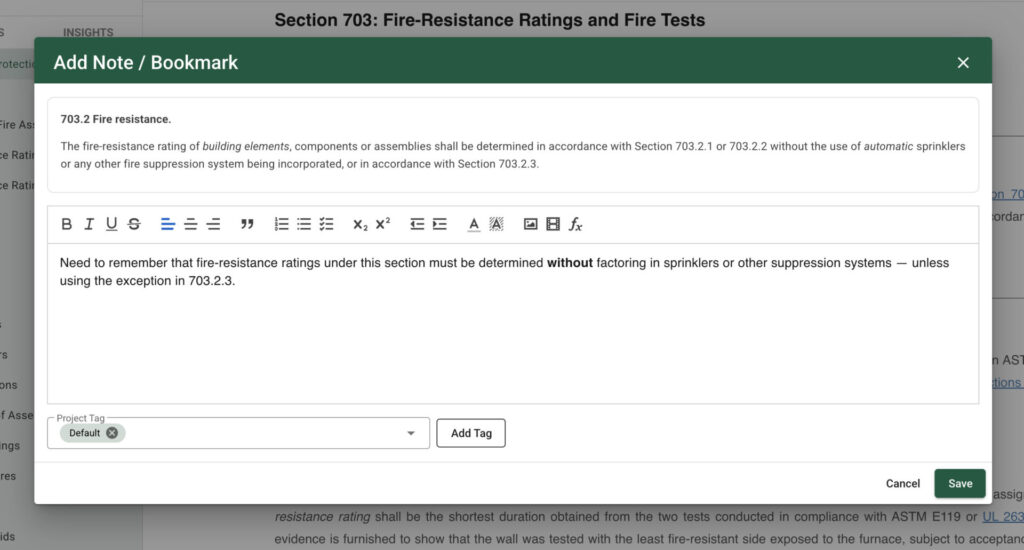
  2. Once you’ve opened the Highlight/Note or Bookmark/Note Panel, type a comment, message, or question in the field. Common formatting for note text is available. These tools include strikethrough and underlining (for legislative formatting useful for marking up amendments) and color coding of text. Additionally, importing images or embedding videos into the note body is available.

Adding Tags

You can filter document notes with tags, a handy tool if a file has a long list of comments. Users can add a new tag or choose one from a drop-down menu of existing tags. Apply any color to a tag for easy identification. Use Project Tags to organize notes in any format, such as topics (e.g. Plumbing) or a project address (e.g., 123 Main Street). Once you’ve created your tags, click save. 


Reading a note

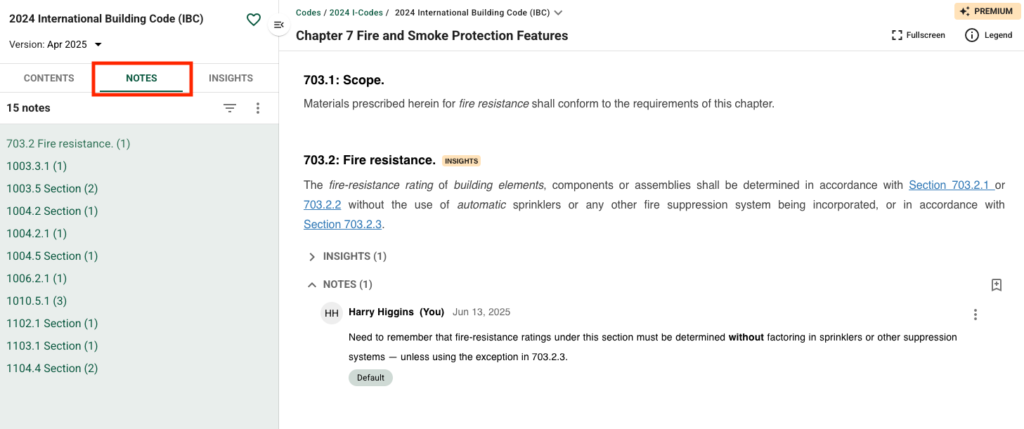
  1. To read a note, go to Legend Information
  • Click the My Notes tab to see a list of all sections in the active title that contain a note.
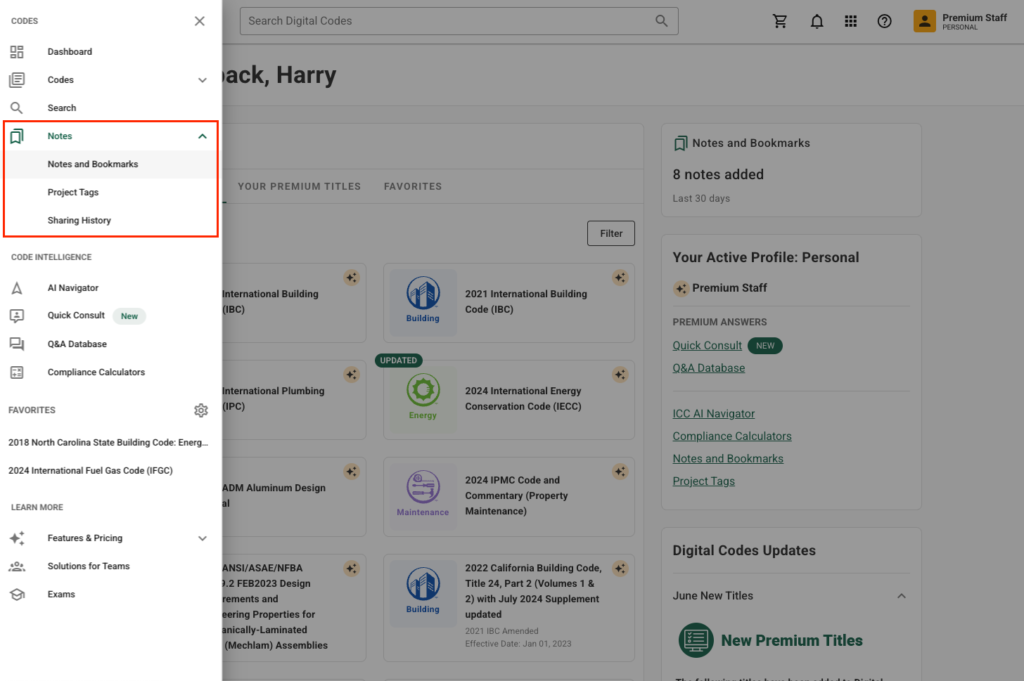
  • Click Filter by Project Tags to see a list of notes related to a specific project tag.
  • Click a note in the left pane. ICC displays the section and note in the right pane.

Filtering notes with tags

Use the filter tool to reduce the number of notes on display in the left pane.

  1. Click the arrow to open a drop-down menu.
  2. Check the box next to one or more tags. A checked box displays notes with that tag.
  3. Click anywhere in the left pane to close the drop-down menu. ICC displays the notes with the selected tag(s).
  4. To remove filters, click the X.

Using the note toolbar

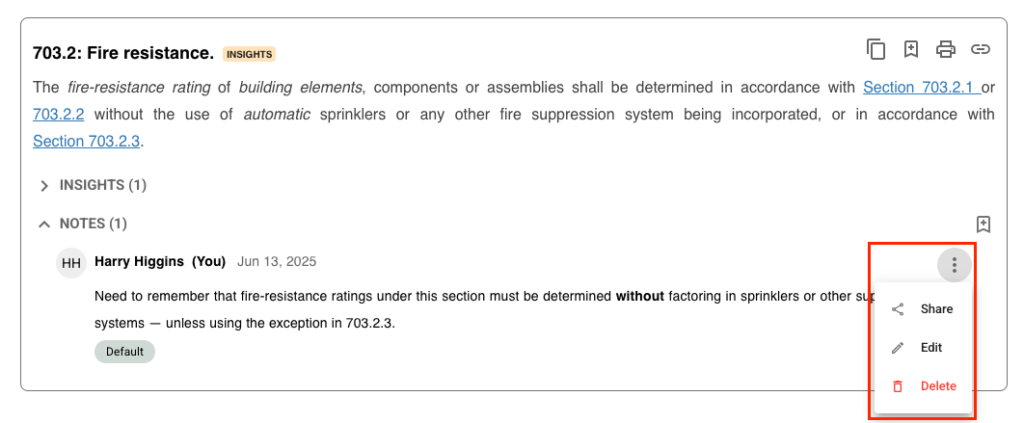
Each note you create displays in the section of the title. Each section note has a toolbar.

  1. Click the pencil icon to change the note’s text or tag.

Sharing notes

Every section note has a unique URL. You can email that URL link. The email recipient must have an ICC account to open the note link in the email message.

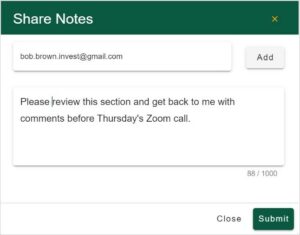
  1. To email a section note link, click the Share icon and type a message (up to 100 characters).
  2. Add one or more email addresses and then click Submit.

Removing notes

To delete a note, click the trash icon and then click Remove in the confirmation pop-up.

To add a custom tag to a note, click the New Tag button, enter a name, and then click Save.

  1. Users can add a new tag or choose one from a drop-down menu of existing tags. Apply any color to a tag for easy identification. Use Project Tags to organize notes in any format, such as topics (e.g. Plumbing) or a project address (e.g., 123 Main Street).
Updated on December 6, 2024

Was this article helpful?

Related Articles